How to perform a MoveTest
This chapter provides guidelines on how to perform physical performance tests with the McRoberts MoveTest by means of some simple tips and tricks.
Our analysis software is sensitive to how tests are executed. Therefore, errors in the analyses may occur when the tests are not executed in accordance with our guidelines. This document aims to standardize the execution of performance tests with the MoveTest, in order to prevent errors and increase comparability.
General
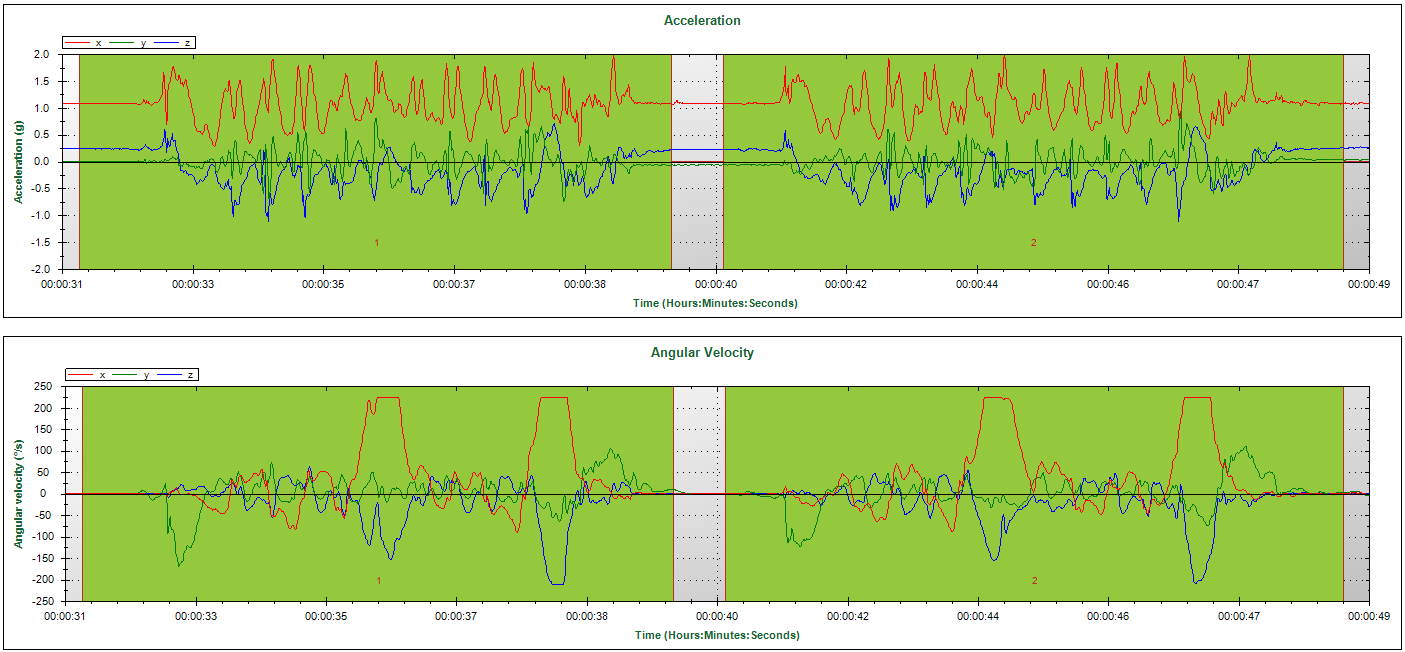
Placement of markers in the data: Performed tests should be marked with a start and a stop marker that mark the time interval of the test. The analysis software searches for these markers before the analysis of the signal can start. Therefore, the start of the test should be well within this marked interval to ensure that it is analysed properly (see the figure below). The same accounts for the end of the test. If a trial fails or if you accidentally place a start marker, you can delete this with the cancel button.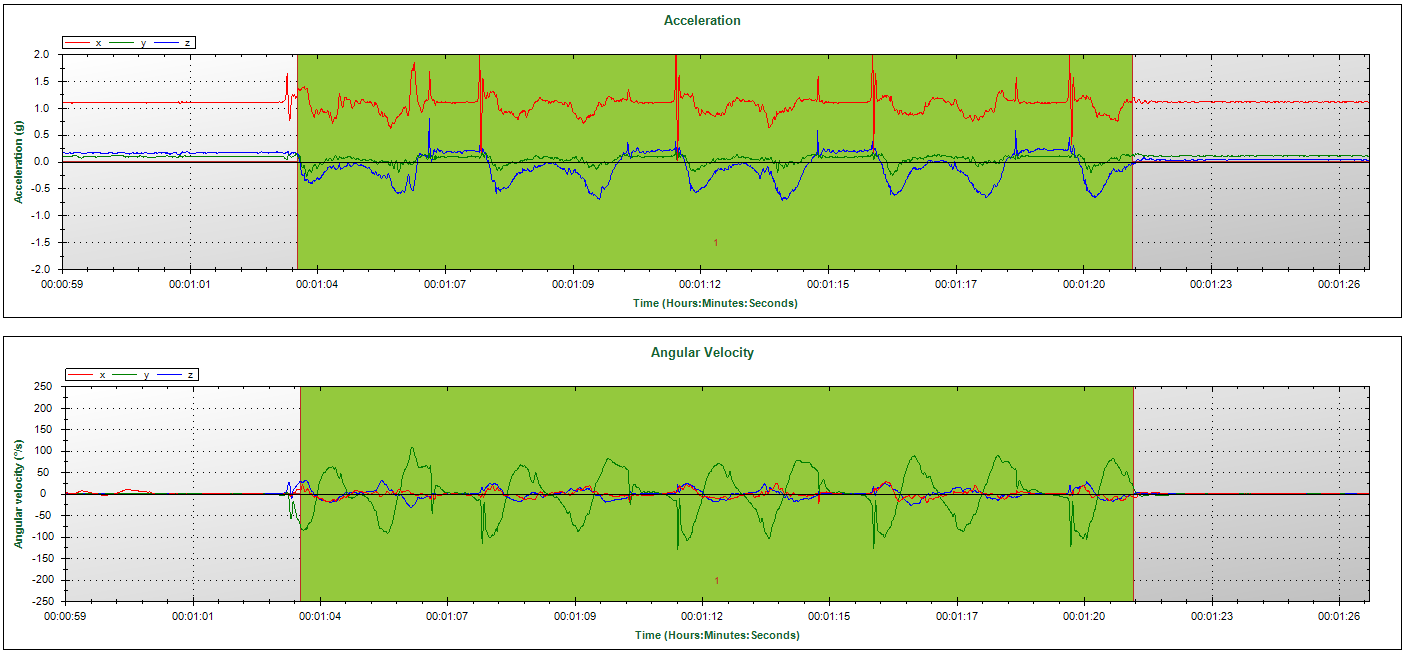
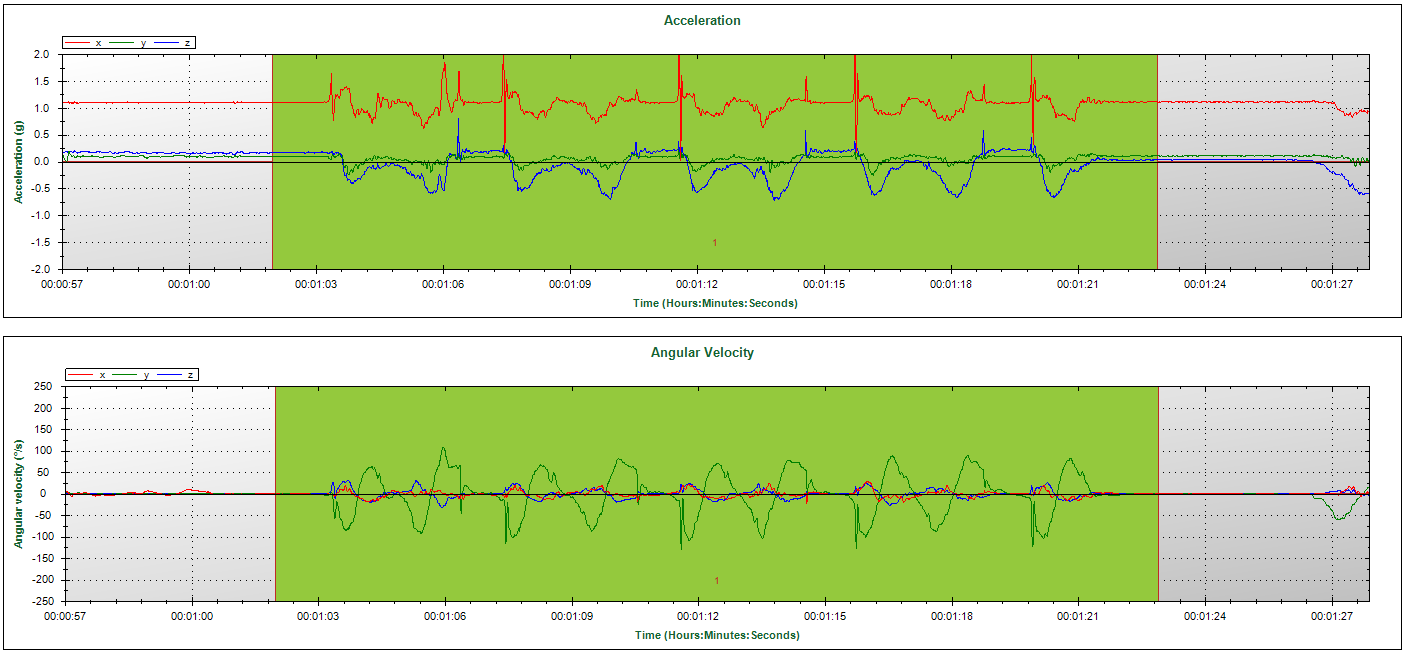
The green plane indicates the marked time interval. The left panel shows a too tightly marked Sit to Stand Test; the test started before the start marker. The right panel shows the same test but correctly marked.
Sit-to-Stand Test
Make sure that the subject starts the test and ends each cycle of the test with his or her back against the back of the chair. Also, after standing up, the trunk needs to be fully extended (see the figure on the right-hand side). Repeat the Sit to Stand 5 times and end with the back against the back of the chair.Timed Up and Go Test
As with the Sit to Stand Test, the start and end of the Timed Up and Go Test (TUG Test) should be with the subjects’ back against the back of the chair. Since subjects will walk after they stand up during the TUG Test, full extension of the trunk is not an issue here.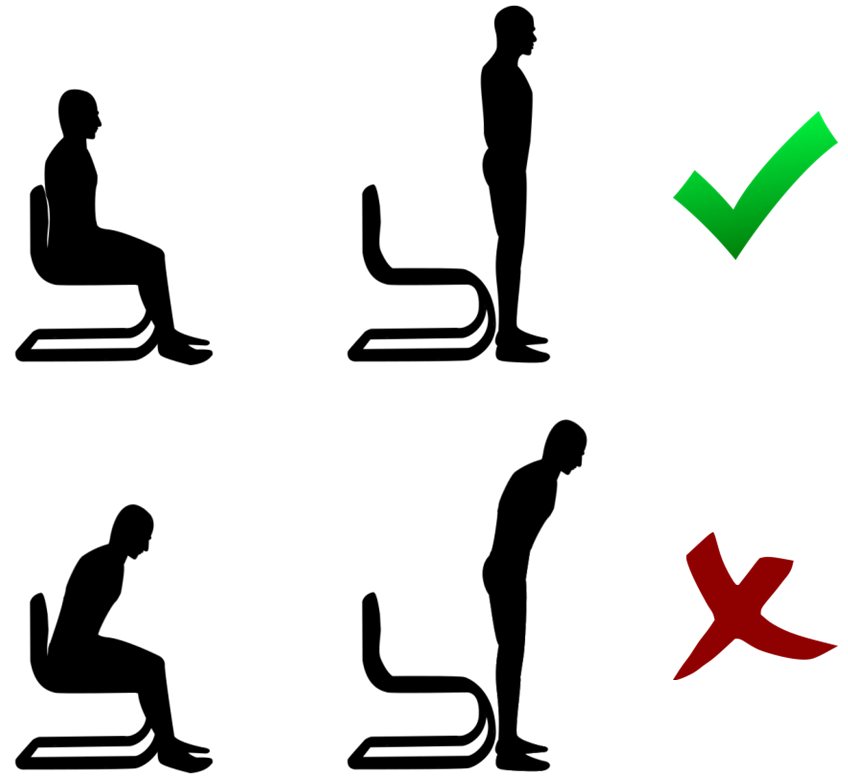
The two upper images display a correct execution of the Sit to Stand Test. The two lower images display an execution of the test that could lead to analysis errors.
TUG Tests are often performed more than once in sequence (e.g. repeated trials or double tasks). The analysis software needs to recognize the different trials. So, the end of a trial and the start of a subsequent trial should not be too close to each other. To avoid this, make sure that the subject sits still for a few seconds between the trials. This also allows for correct placement of the markers, as indicated in the chapter ‘General’. This can be achieved by clearly informing the subject to wait for instructions on when to start the next trial.
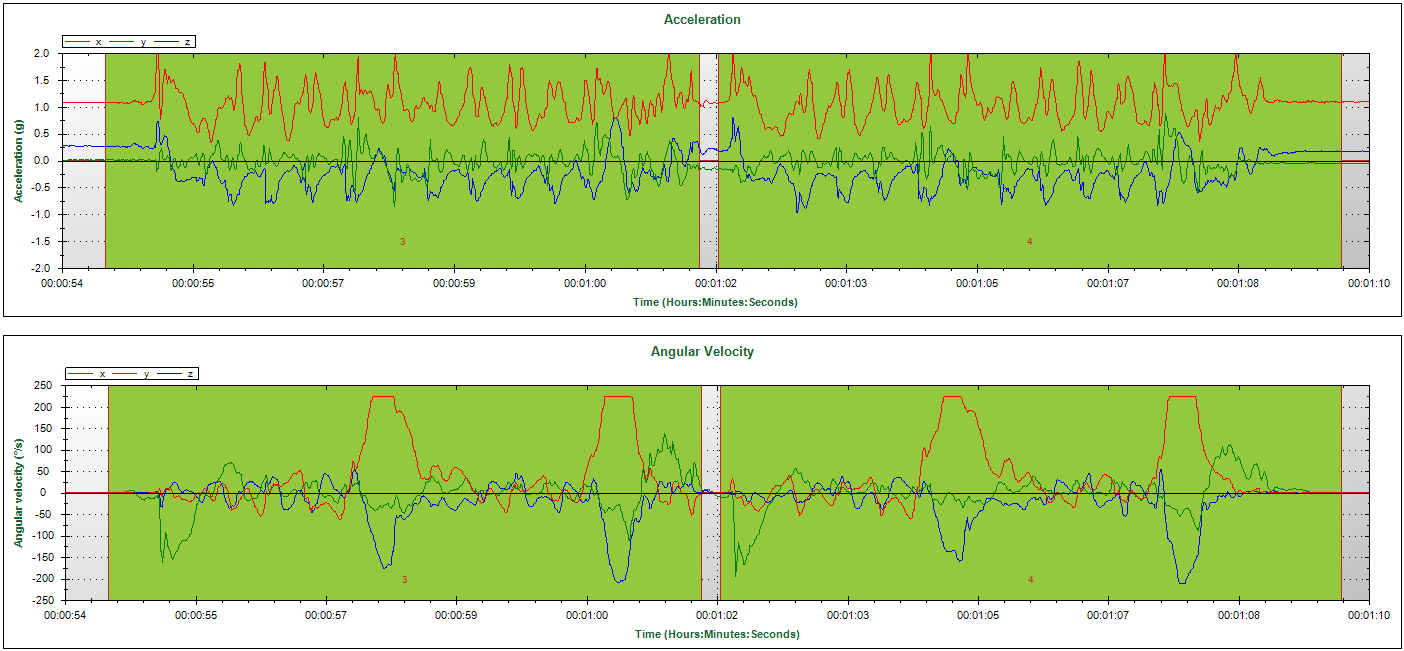
The green plane indicates the marked time interval. The left panel shows two trials with too few time between them (i.e. no clear dissociation between the end of the first trial and the start of the second trial). The right panel shows two trials with appropriate time between them.
GaitTest
To ensure errorless analysis of the data, the setup depicted below is recommended. Ask the subject to walk back and forth between the pylons. Mark the passing of the lines of the “steady state trajectory”, using the remote control.
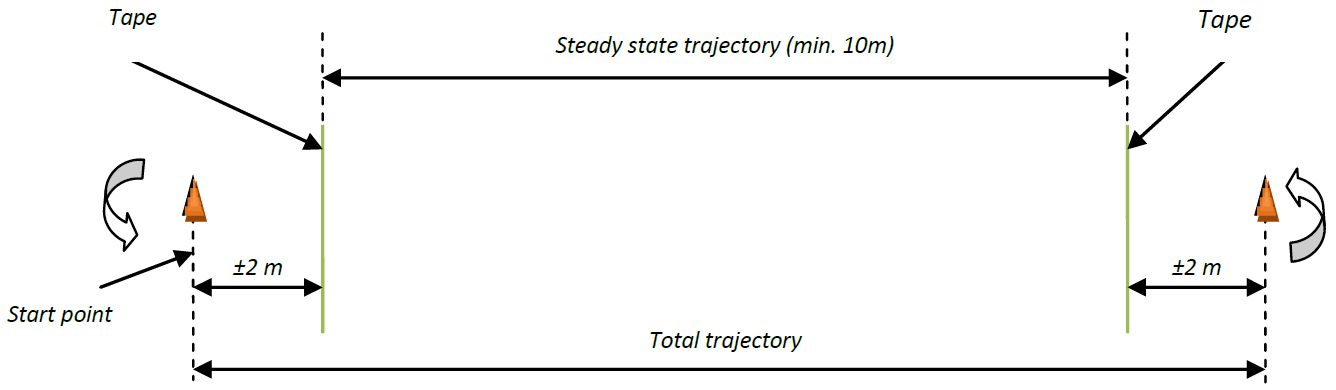
A recommended setup for the Gait Test.
Avoid turns in the gait trajectory, this will influence outcome parameters and step detection
SwayTest
The instructions below guide you in how to perform a reliable Sway Test.
Instructions:
- Stand next to the subject to help him/her into the preferred position (e.g. side-by-side, semi-tandem or tandem).
- Supply just enough support to the subject’s arm to prevent loss of balance.
- When the subject has gained his/her balance in the required position, ask “Are you ready?”
- Then let go and place the first marker as you say, “Ready, begin”.
- The second marker is automatically placed when the programmed time has passed. Hereafter, say “Stop”.
When the subject steps out of position or grabs your arm, stop the current trial. The trial will be regarded as not completed.
Please note that for Sway Tests, start and stop markers cannot be edited afterwards since for Sway Tests these cannot be identified visually.
6-Minute Walk Test
This test can be performed on a straight trajectory with a length between 10 and 50 meters. The software does not support rectangular or circular trajectories; there should be clear 180° turns in the trajectory. The instrumented 6-Minute Walk Test can be performed in the same way as a the non-instrumented version. This means that walking aids may be used and that intermittent resting is allowed.
The test is being started by clicking the marker button or remote control button once. This will trigger the 6-minute count down. After 6 minutes the end marker will automatically be set. No markers should be placed during the performance of the test!
